Everyone gamer wants to become a streamer at one point in time. But due to the lack of knowledge on how to get started, most of them drop the plan to start streaming. The truth is, setting up the streaming software is really simple. And this article is your ultimate guide to streaming in 2021. For this guide, we will be using Streamlabs OBS software to set up your streaming. So without further adieu, let’s jump into how you can install & set up streamlabs.
How To Set Up Streamlabs For Streaming
Downloading And Installing Streamlabs
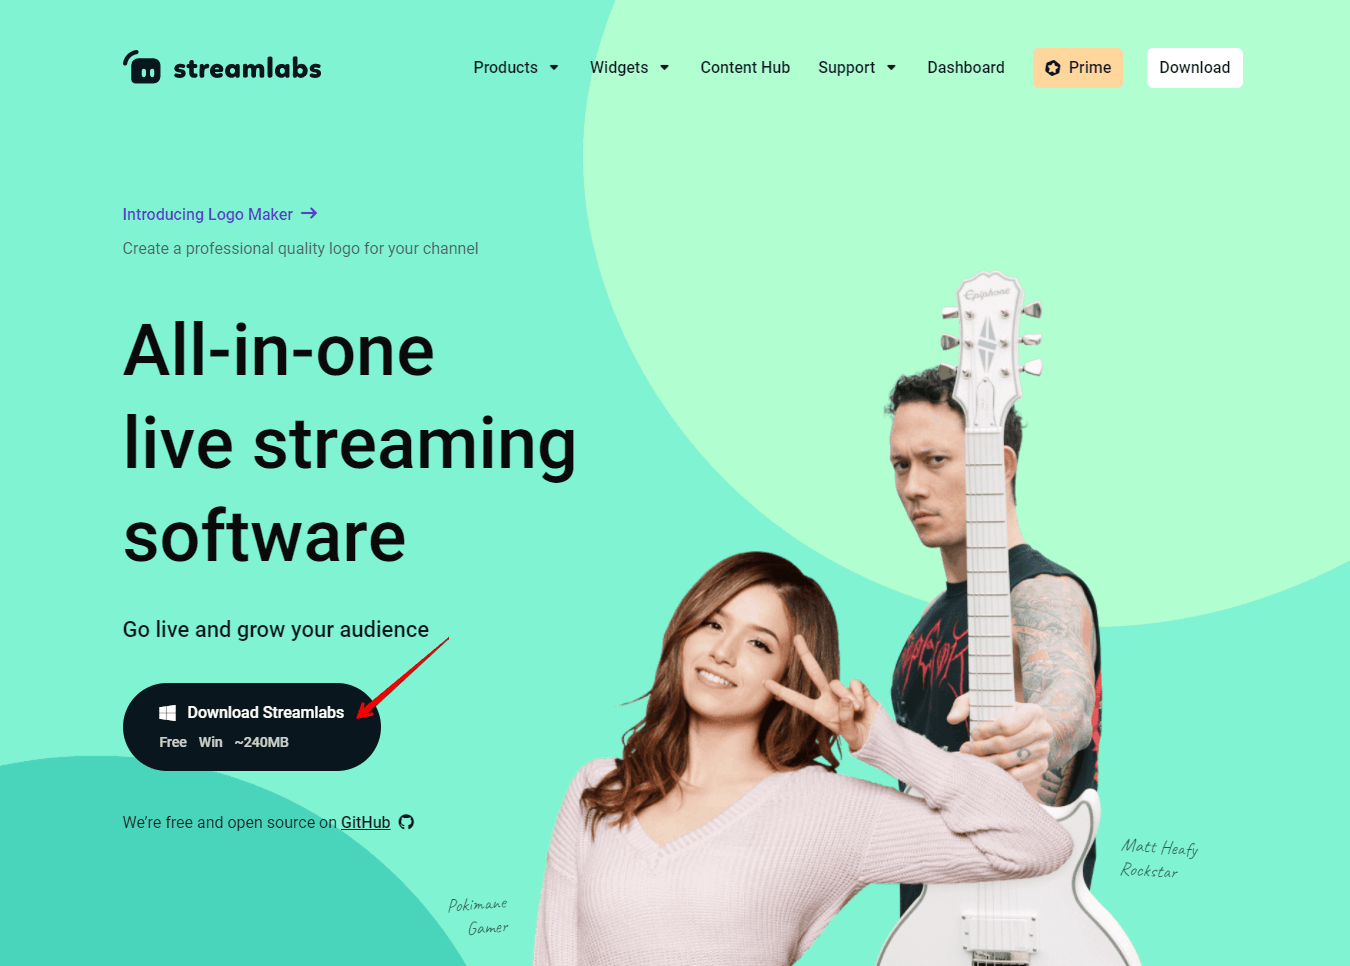
Step 1: Head over to Streamlabs.com and download the Streamlabs app, which is roughly 240MB.
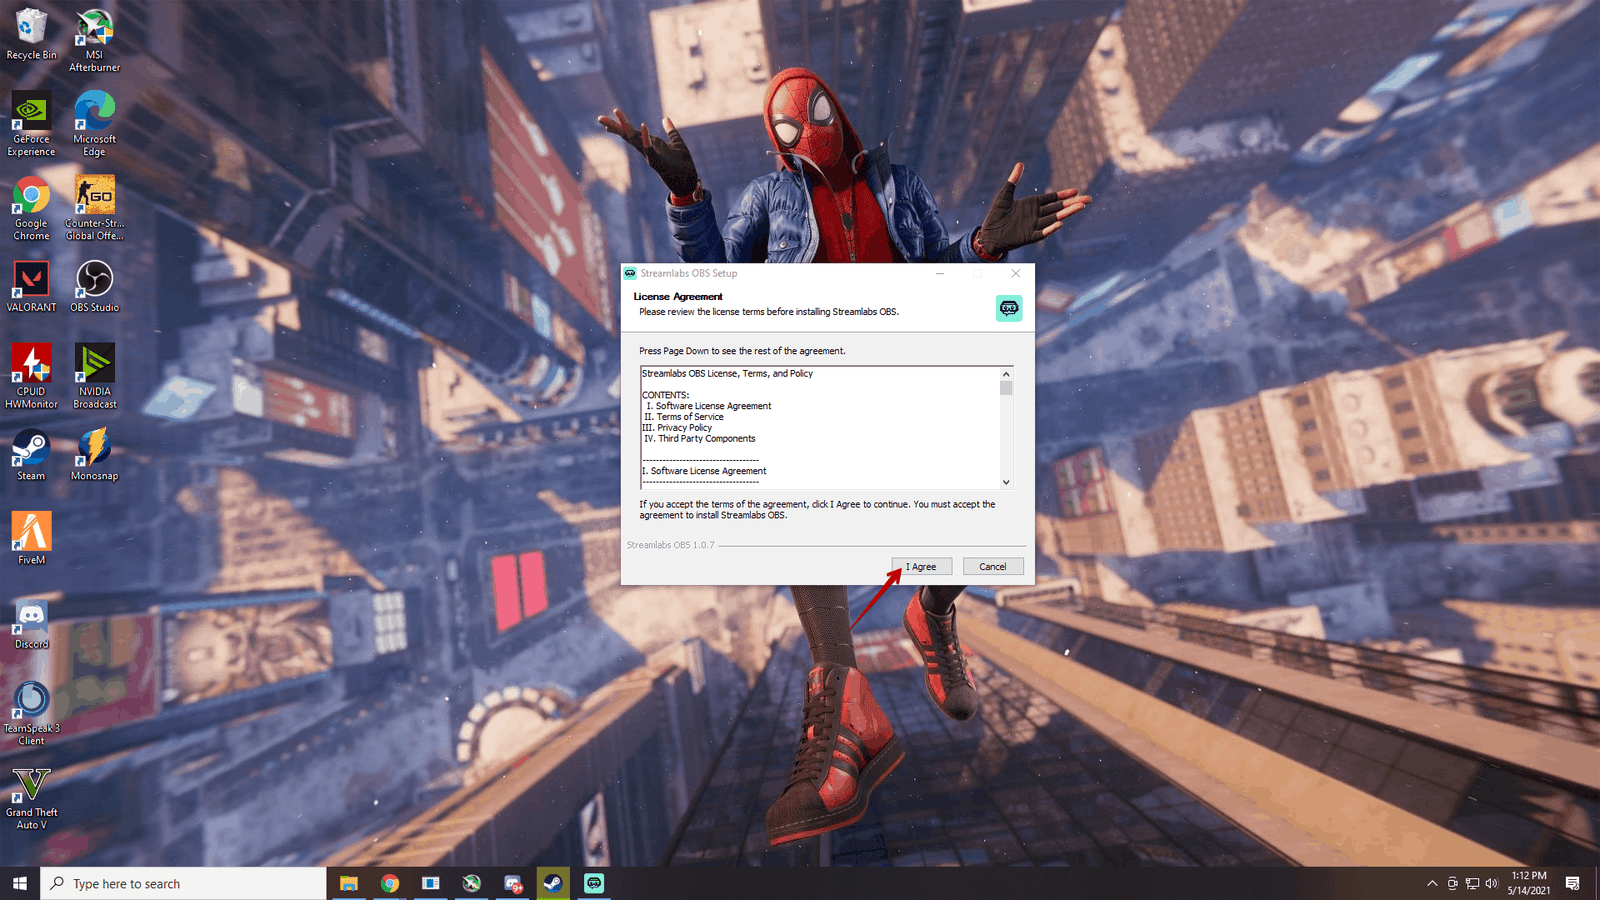
Step 2: Accept the license agreement and proceed with the installation process.
Step 3: Choose the location to install and proceed with the installation.
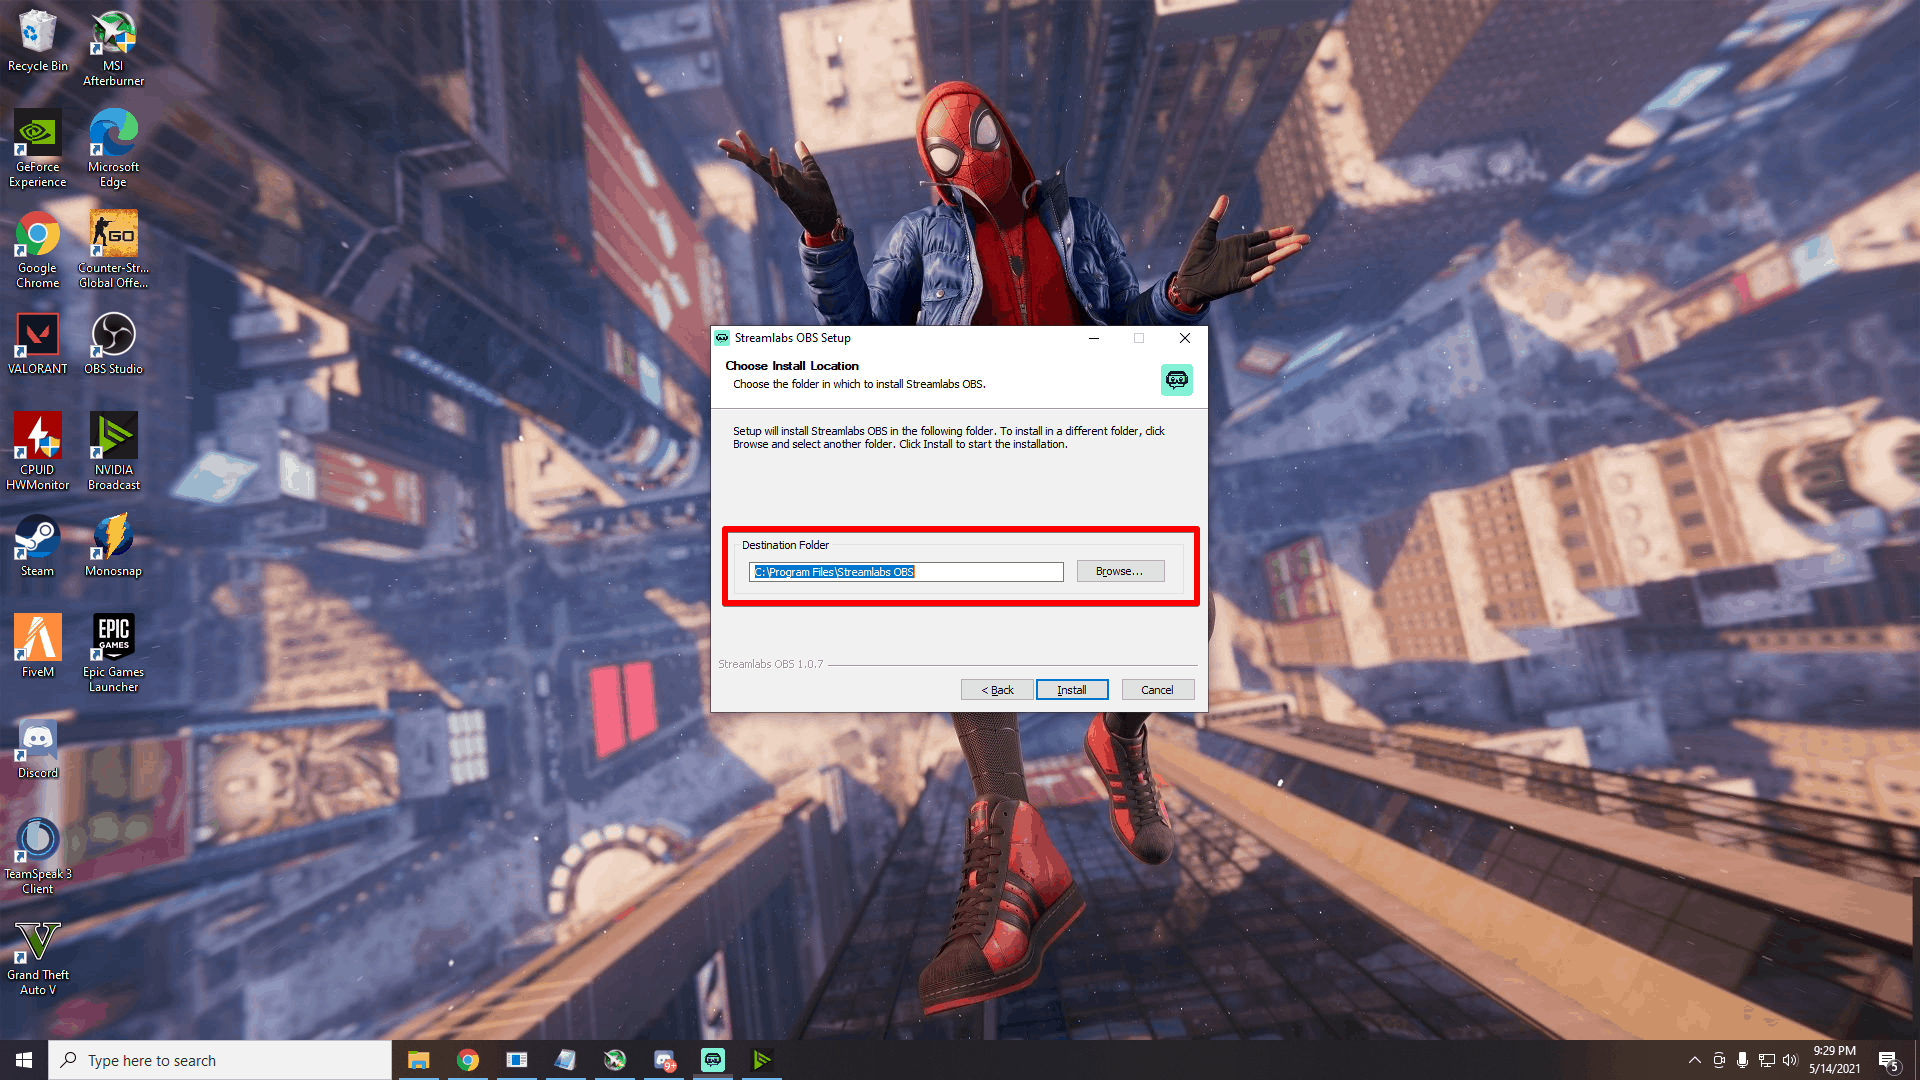
A quick tip: Install in any other drive other than C, as it will be easier if you are willing to record or set up a replay feature on Streamlabs as it will take up a lot of space depending upon the quality.
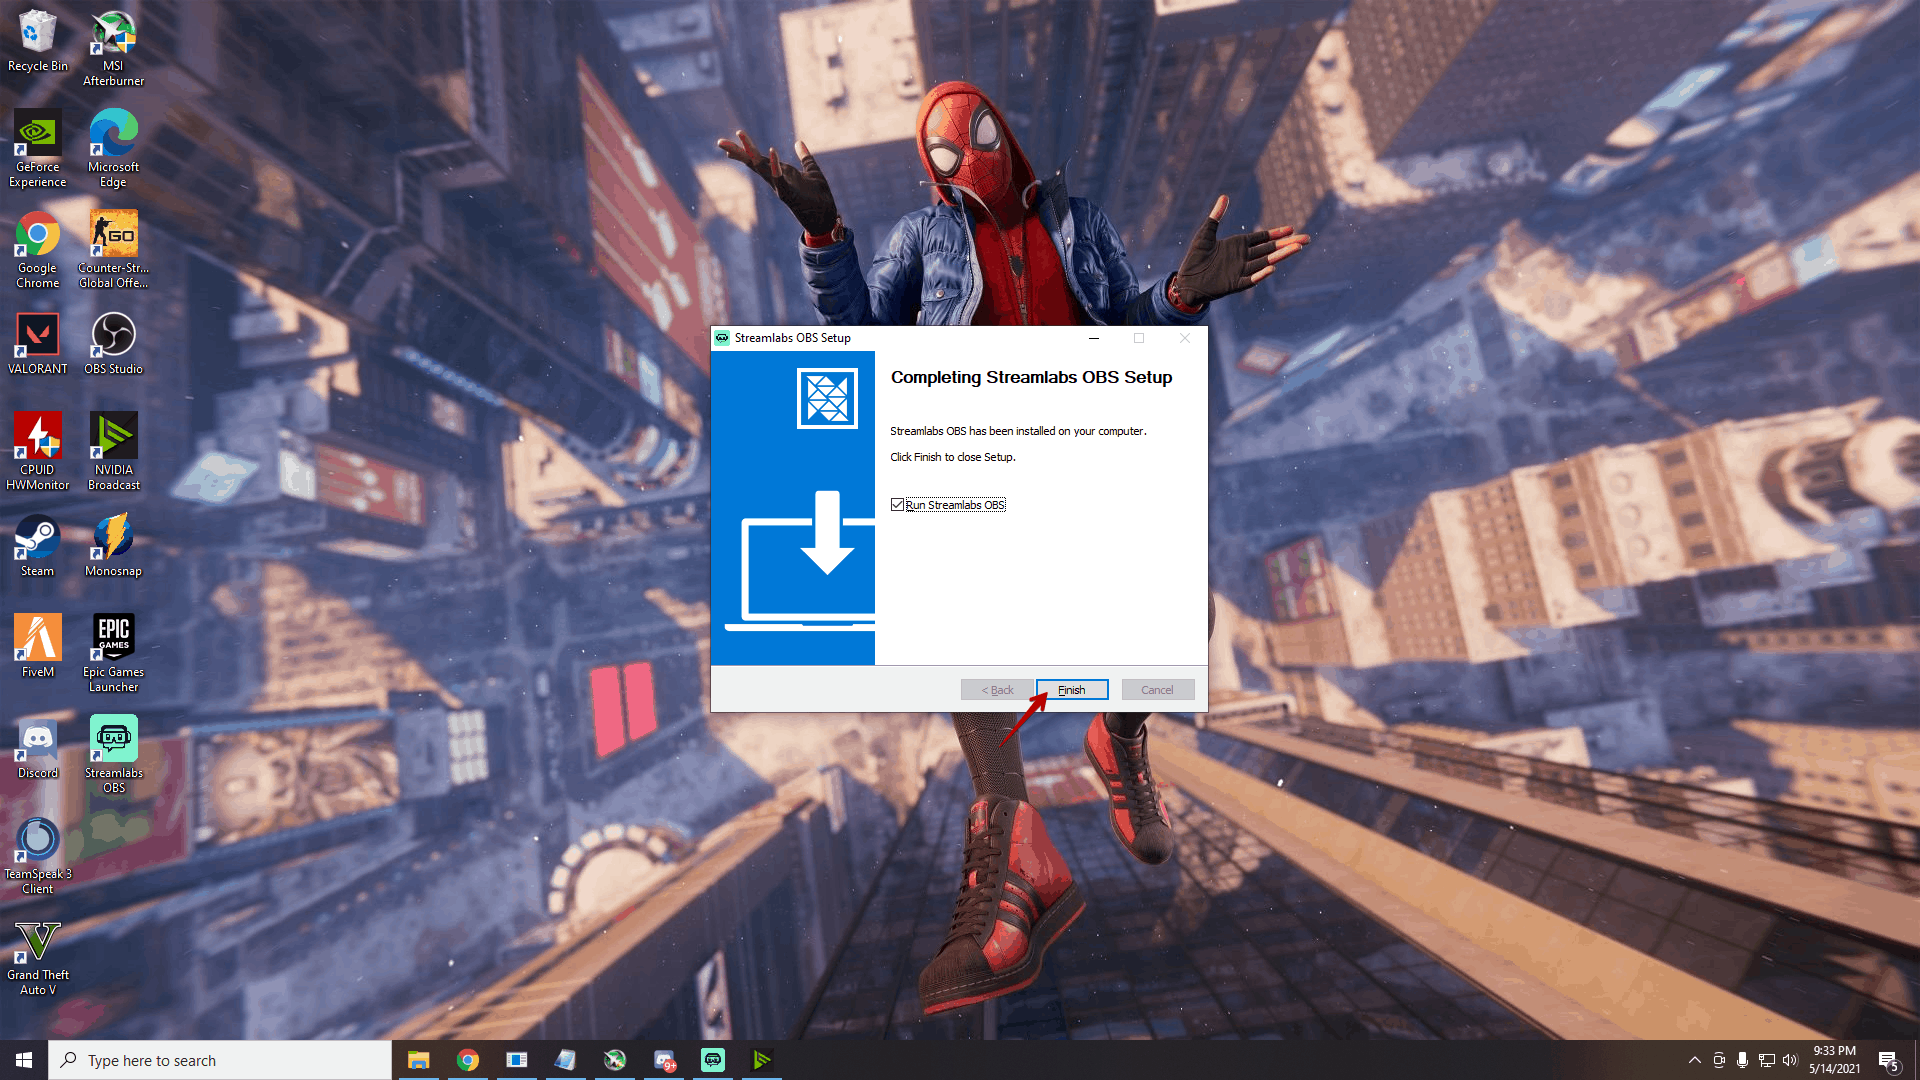
Step 4: Click on ‘Finish,’ and the streamlabs app will open up.
Streamlabs Initial Setup
Step 1: Once you open streamlabs for the first time, it will prompt you to log in to the platform where you will be streaming.
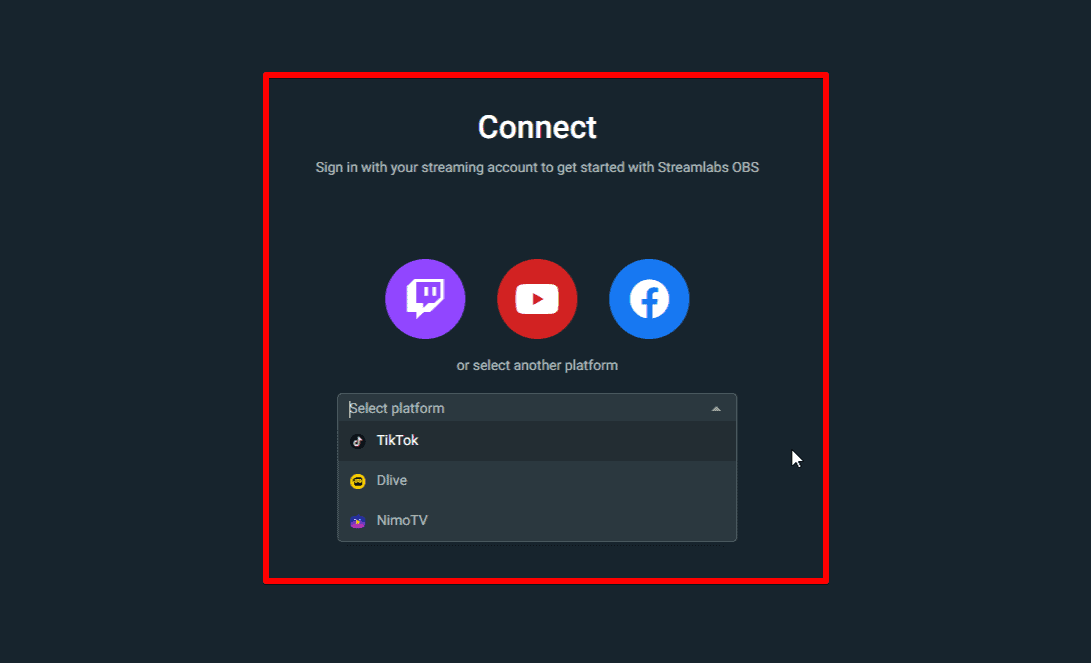
Initially, you will be having an option between Twitch, YouTube, Facebook, TikTok, and Nimo TV. But don’t worry, we will guide you on setting up any streaming platform with streamlabs.
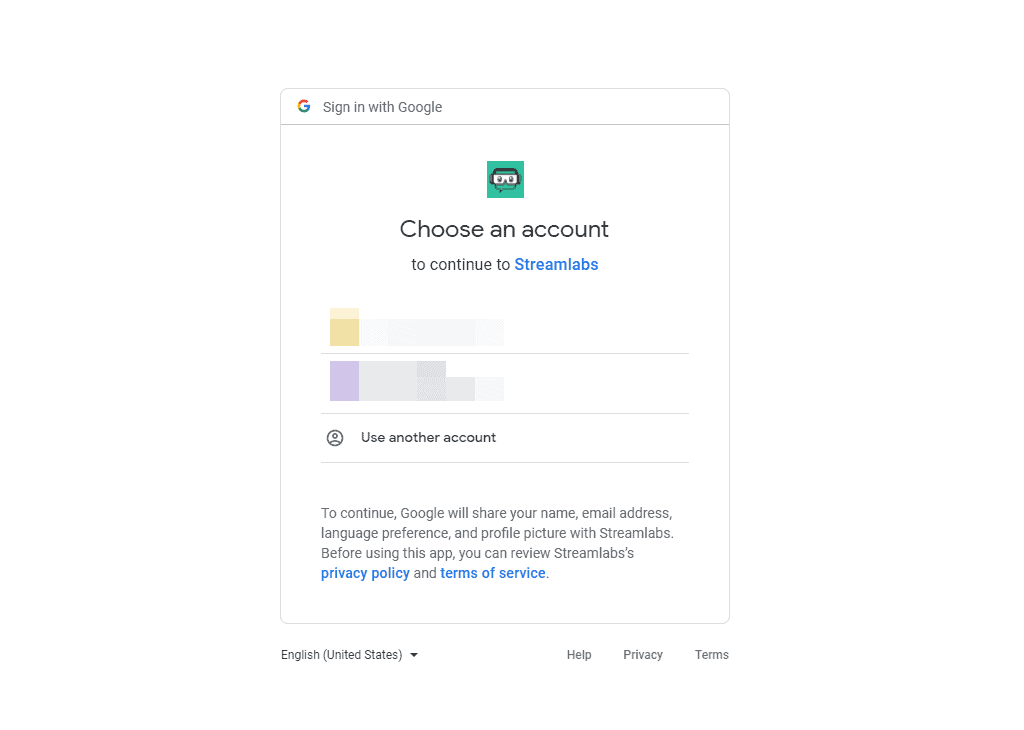
Step 2: Click on the desired platform you wish to stream, and a browser window will open where you can log in to your account. In my case, it will be YouTube.
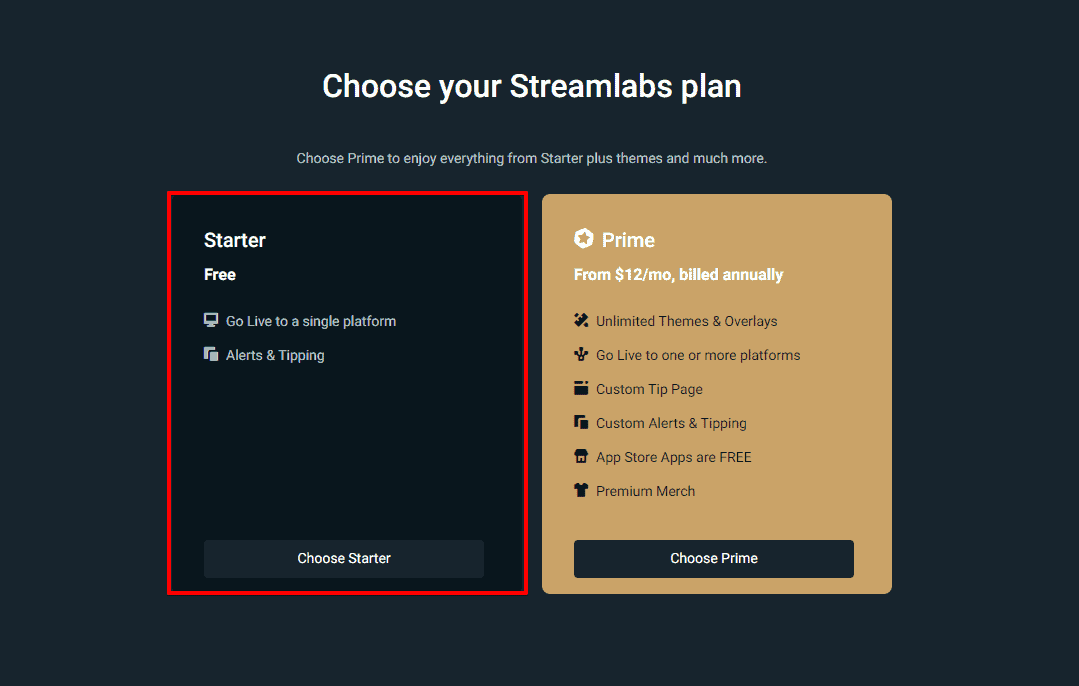
Step 3: Once you log in, there’ll be another prompt to choose between Starter vs. Prime. The free plan is more than enough, so choose the starter plan and proceed. When you grow further, you can have a look at Streamlabs Prime and sign up.
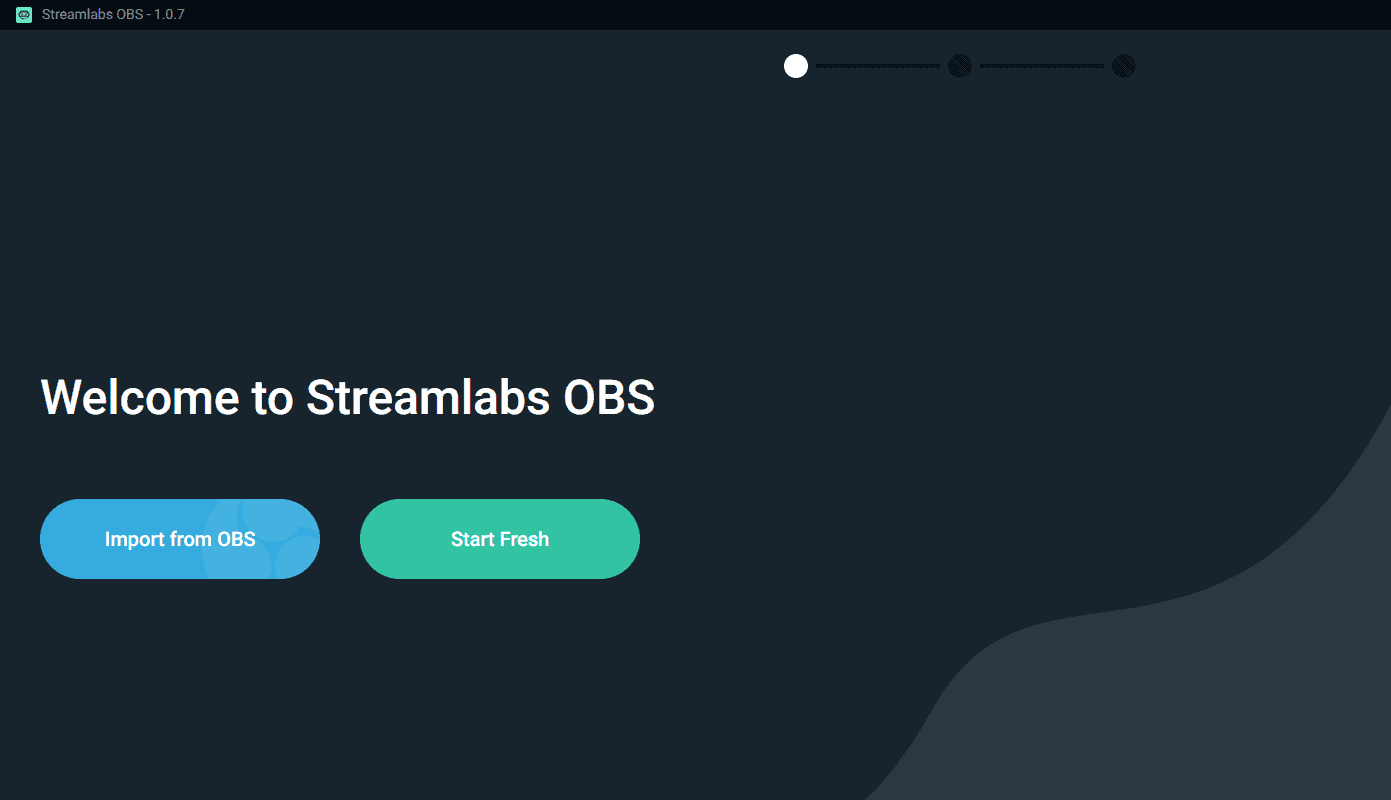
Step 4: Choose the start fresh option as we will be adding things manually and proceed to the next step.
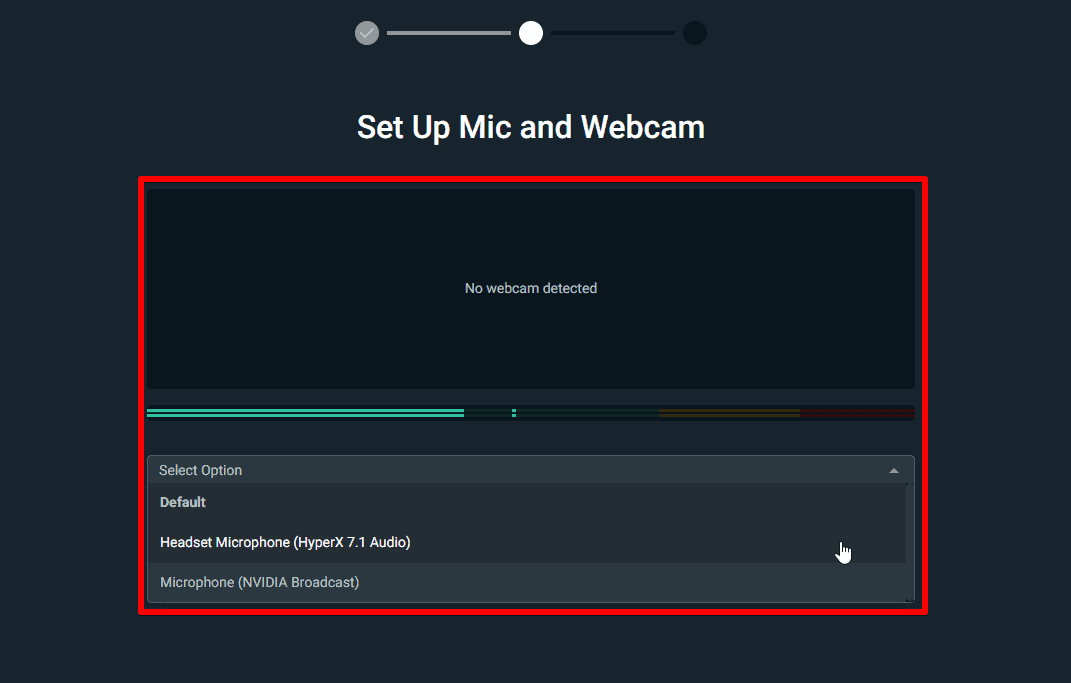
Step 5: Select your microphone and camera that you will be using in this step and click on continue.
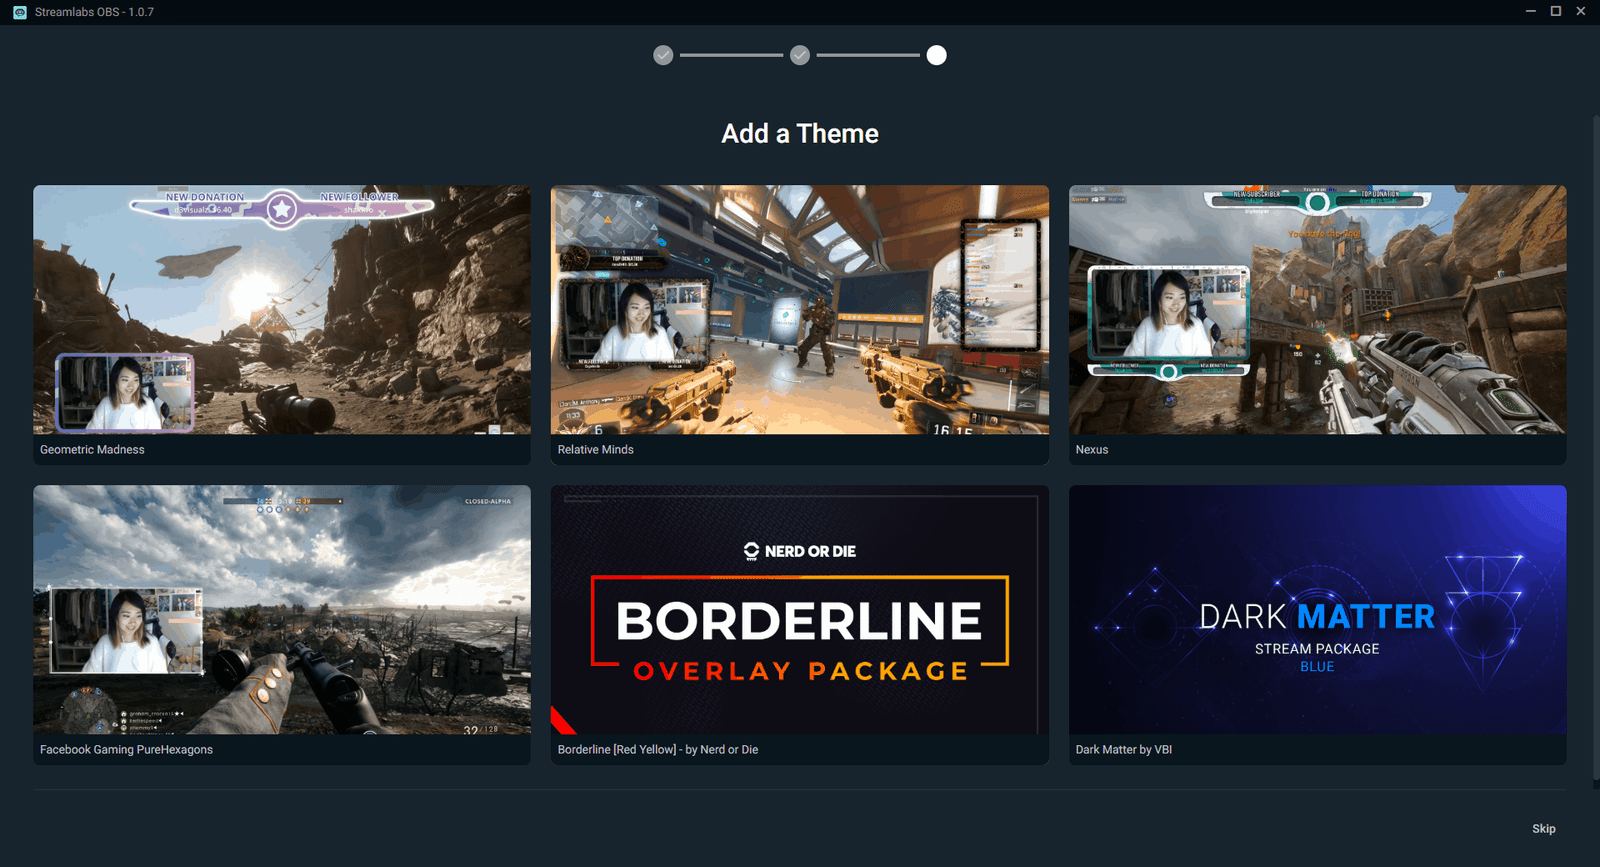
Step 6: Select a theme in case you want some pre-designed templates and proceed. Or skip if you want to get creative. In our case, we will be not be using any theme.
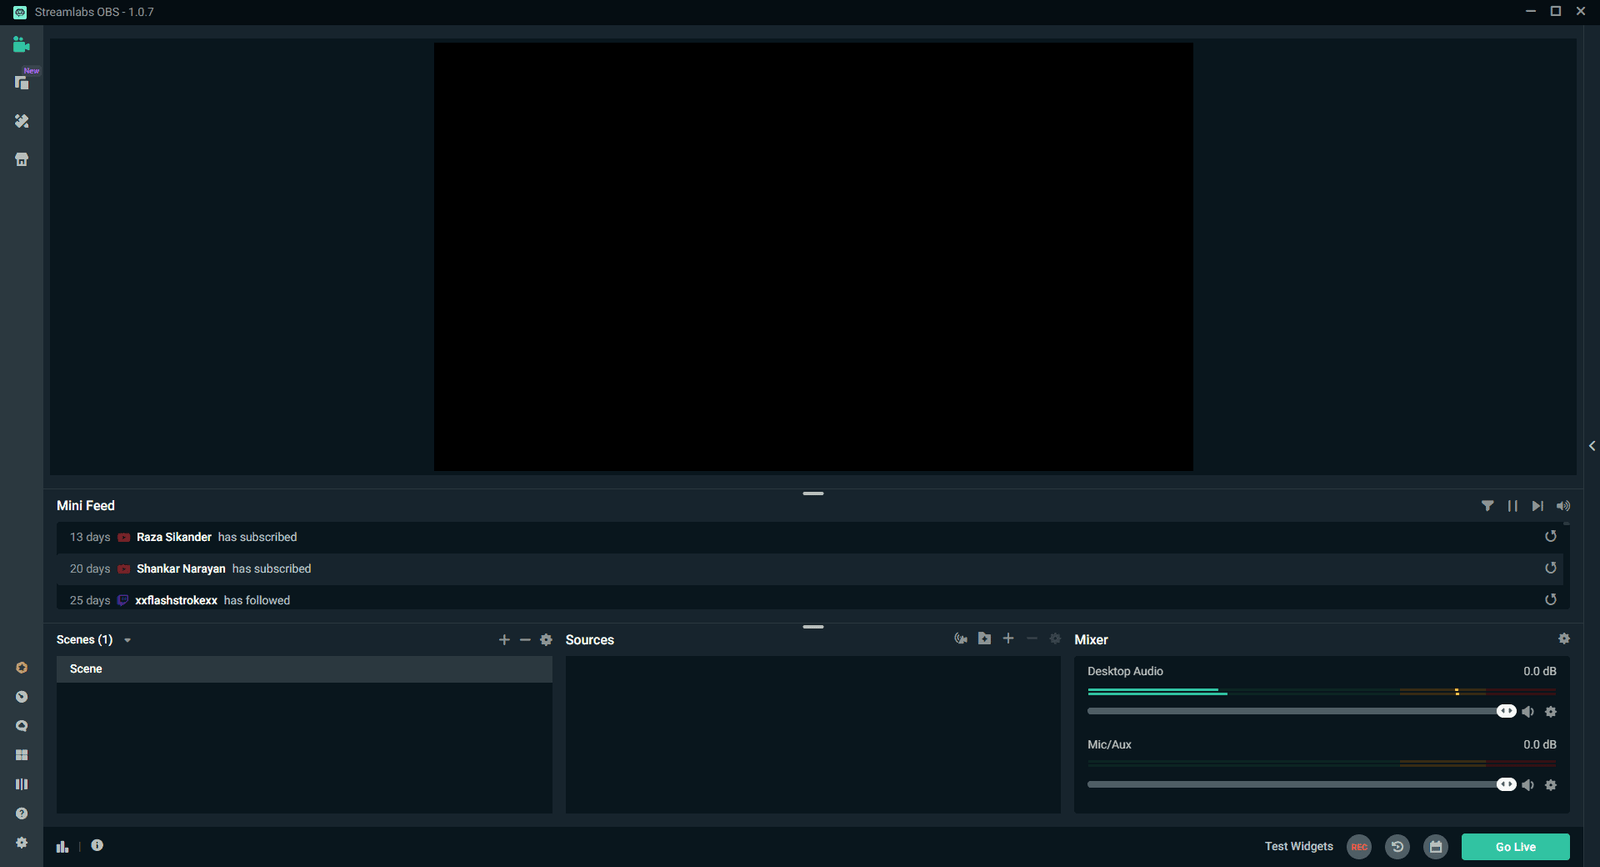
Step 7: You will see this screen with lots of different options but don’t worry, we will go across all of them and make it easier.
Streamlabs – Adding Scenes And Sources
In this part of the article, we will be going across the basic setup of your stream, where you can add different scenes and sources to your stream.

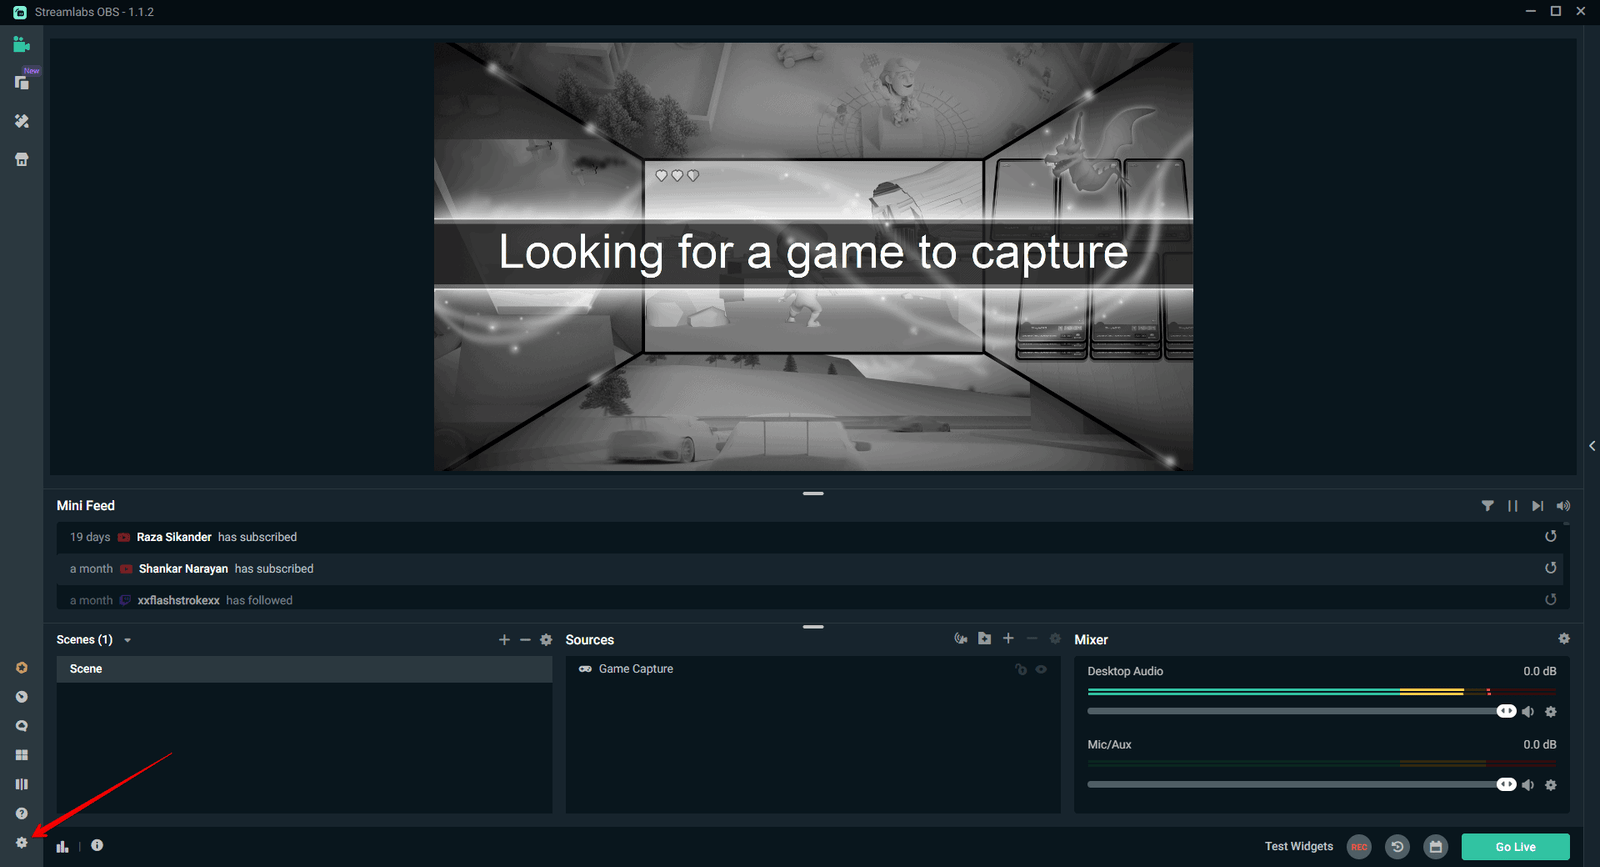
As you can see from the above screenshot, the primary part we will be customizing is split into three sections.
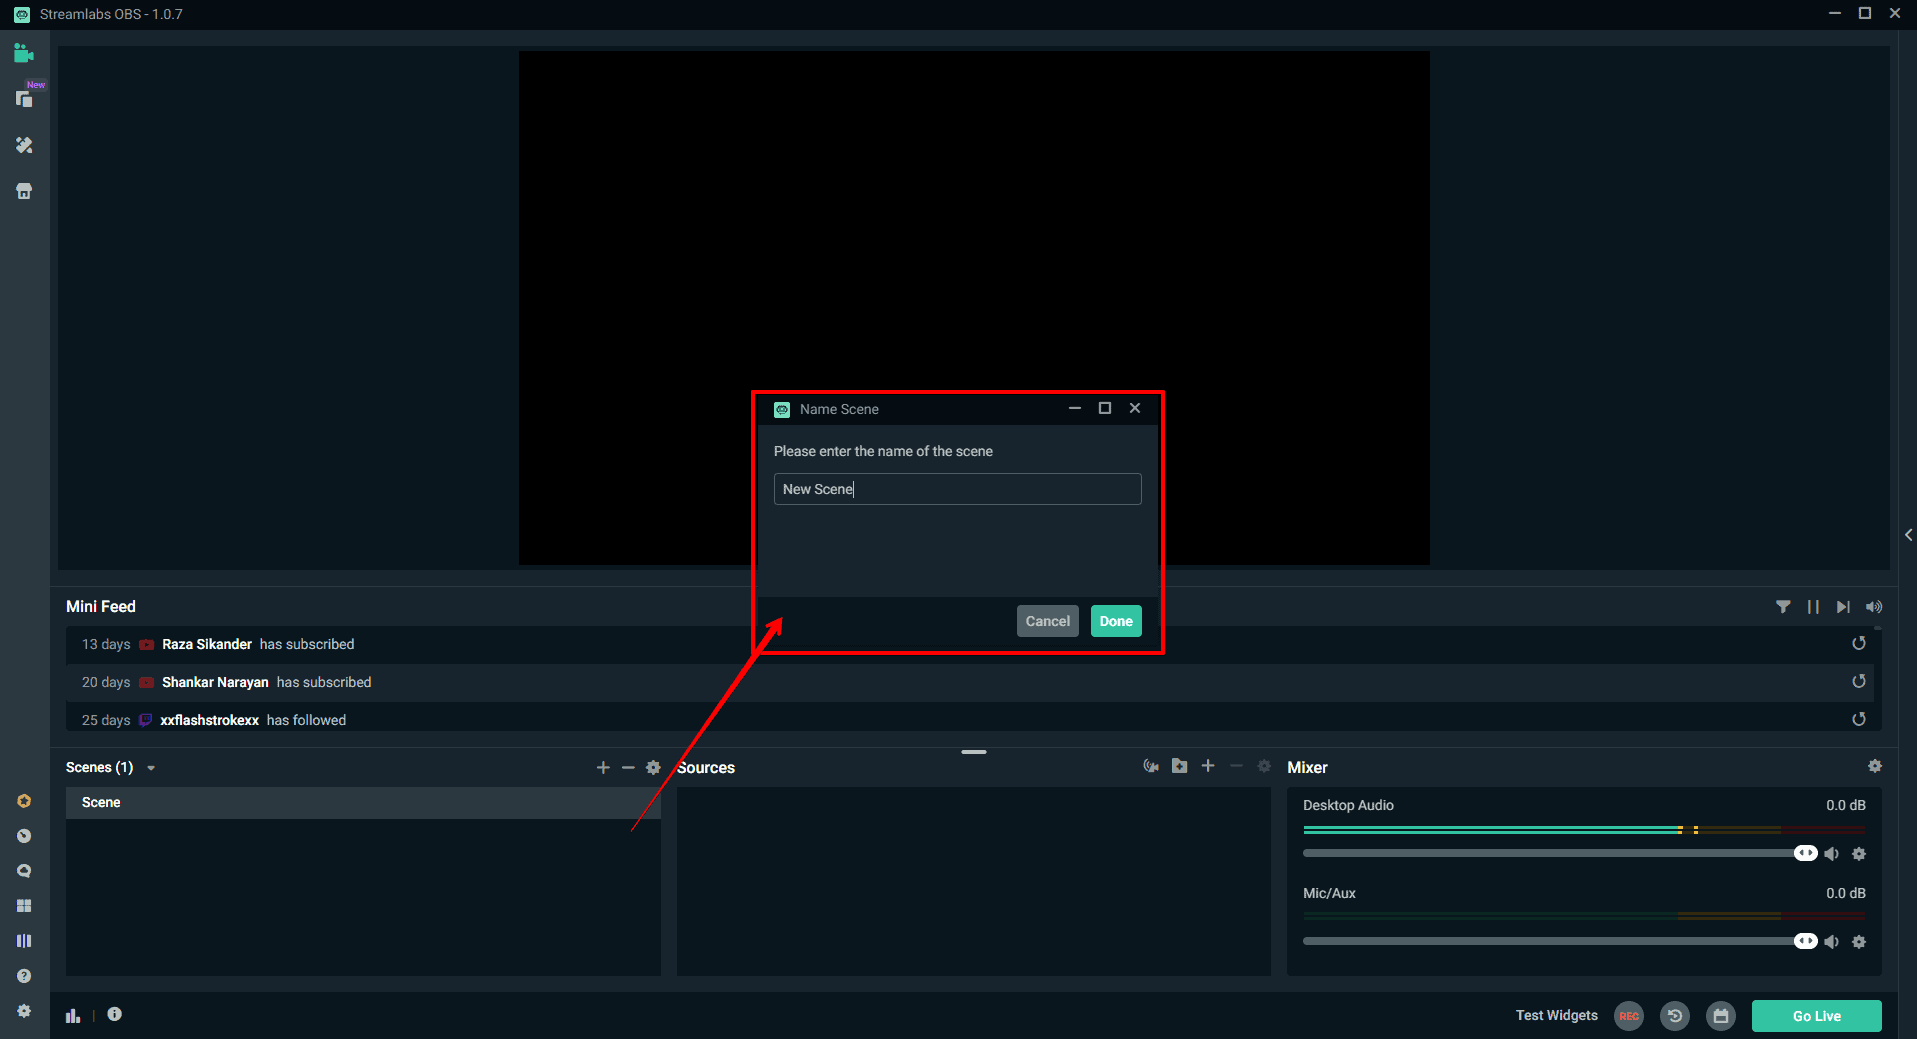
Scenes – The different scenes you can add to your stream—for example, a welcome scene, a break scene, the main scene, etc.
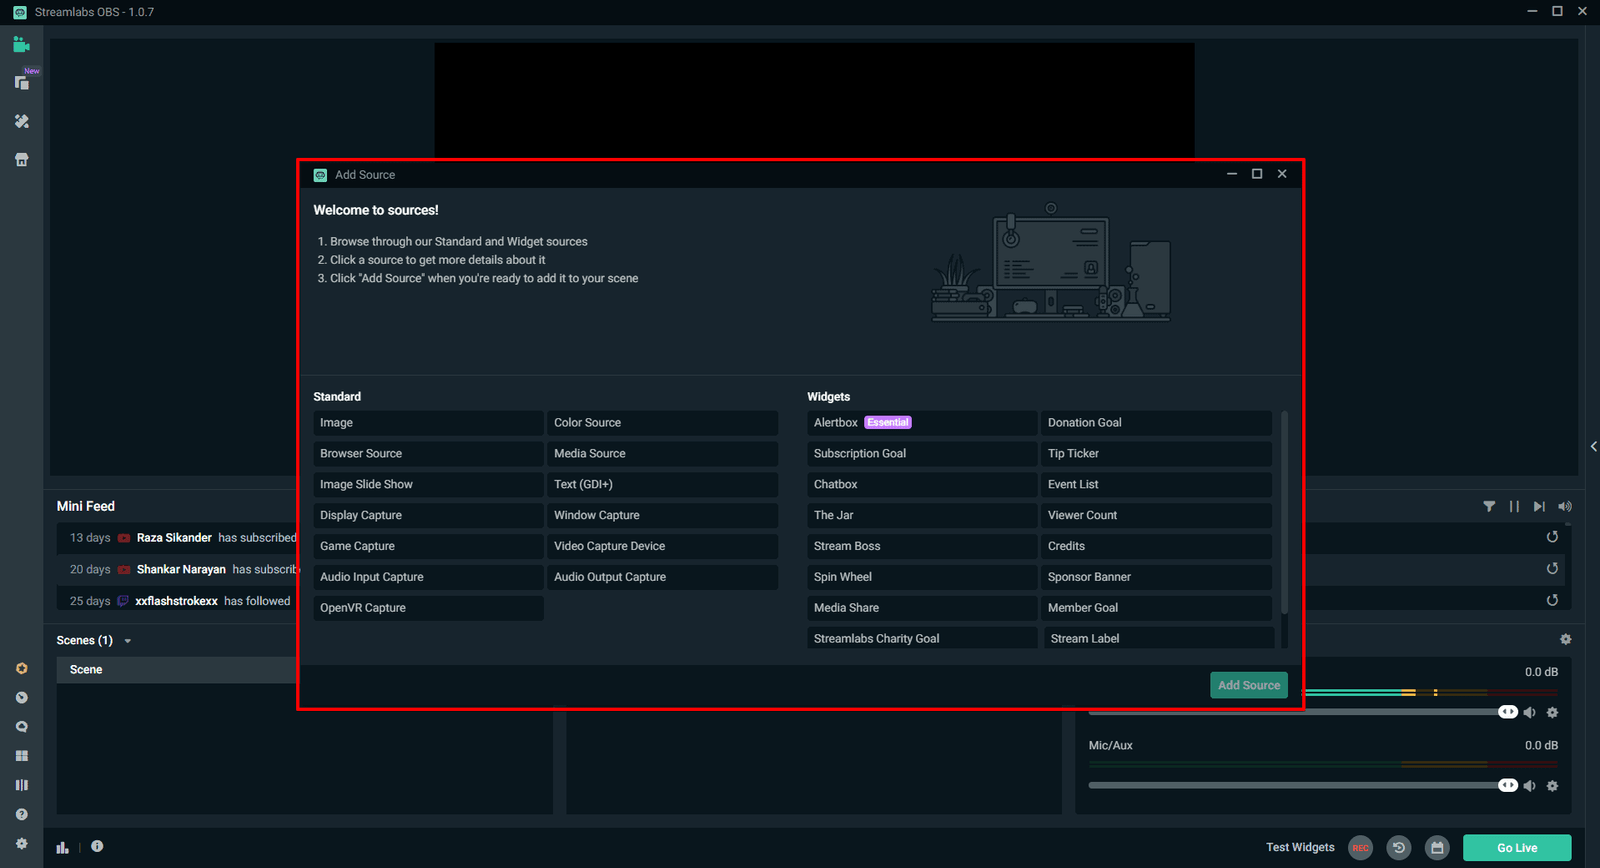
Sources – The different elements you wish to add in your scene, you can add anything right from a browser source (Which is used for in-stream notifications) to display or game capture (Which is needed to capture your game or display).
To get started, let’s customize our primary scene 1.
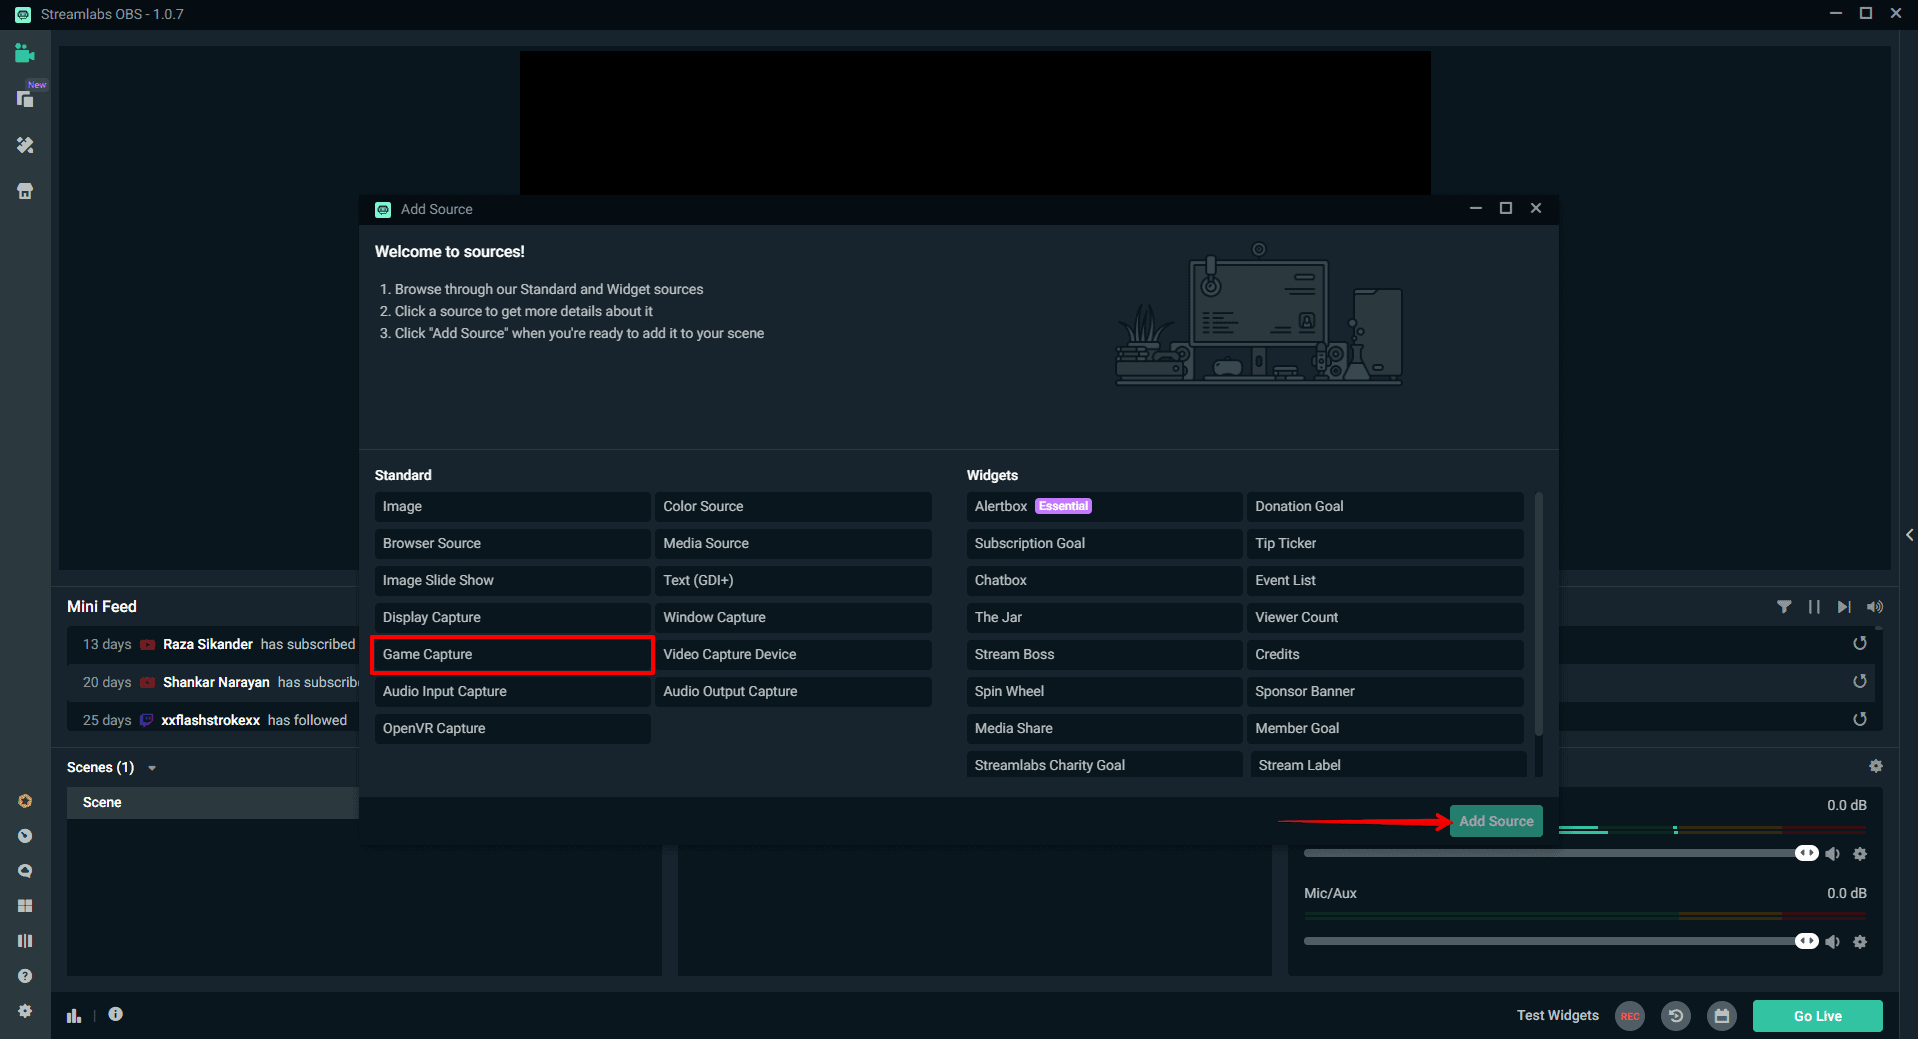
Step 1: Under the sources tab, press the small + button. A prompt will appear with lots of options; under the Standard tab, click on the Game Capture option and add it as a source.

Step 2: Once you add Game Capture, there will be another pop-up with different options. Under that, the capture method will be under ‘Auto,’ which means it will automatically capture the game depending upon the game open on your computer.
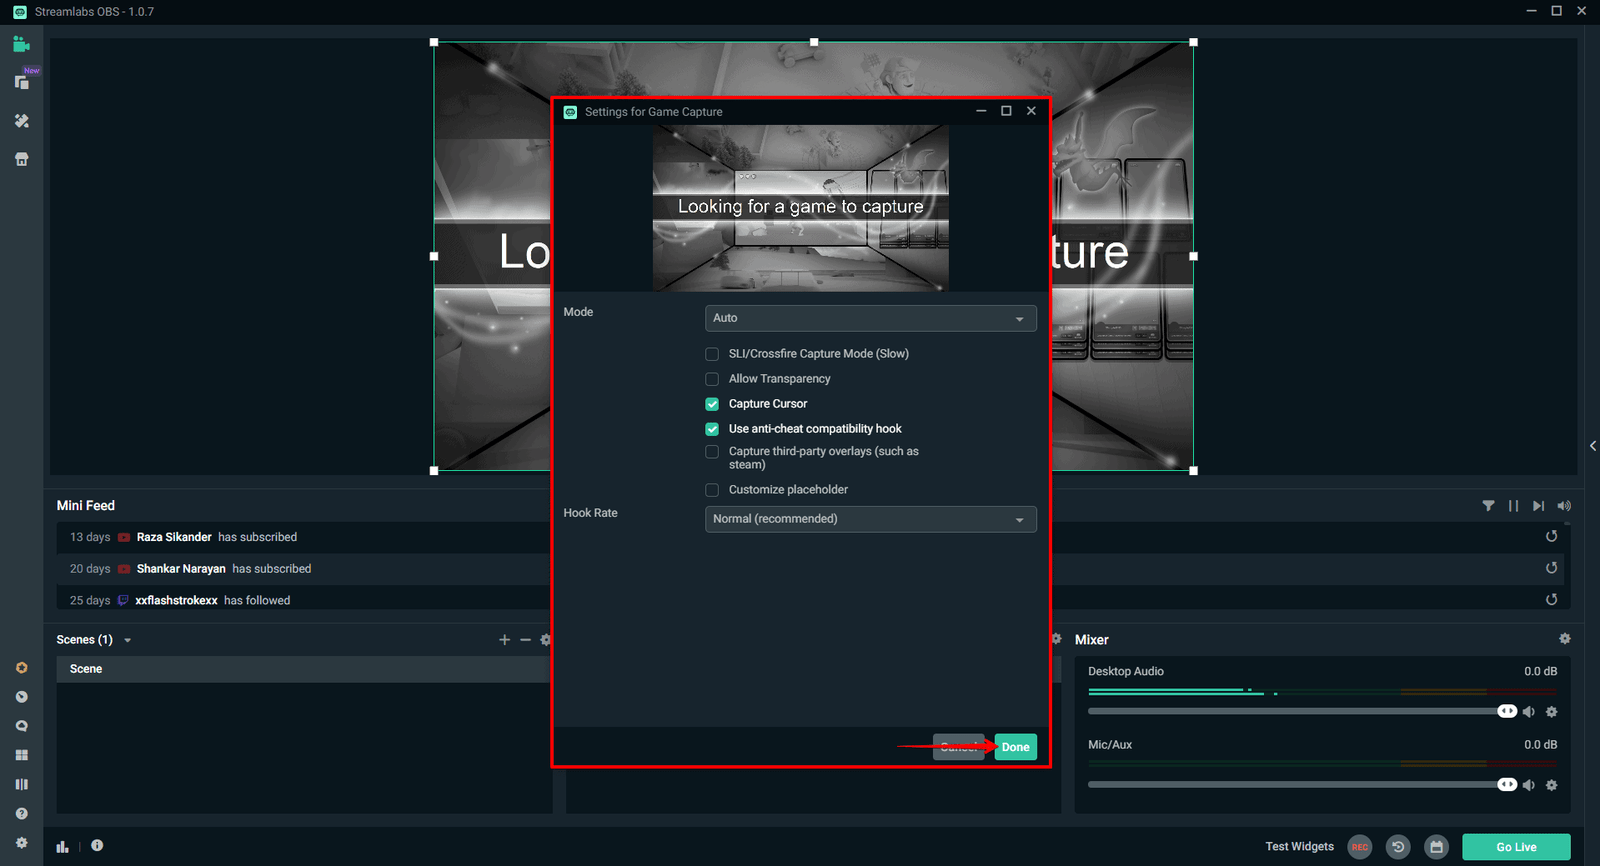
You can change it by clicking on the drop-down and choosing the different options.
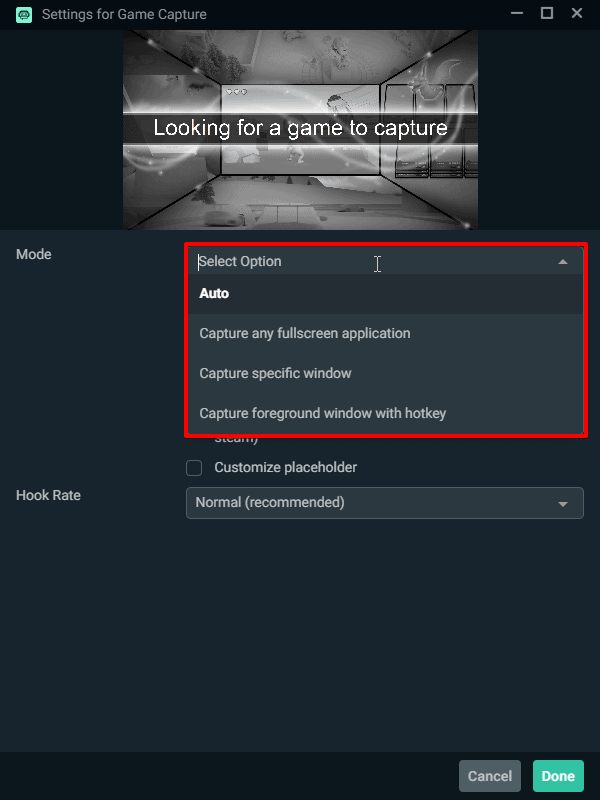
Step 3: Open a game, and the game capture will automatically capture the game window.

Streamlabs Settings And Other Information
Having learned about Streamlabs’ setup, the next thing you need to do is to change the stream settings in streamlabs. You might wonder why we are doing this. It’s because, by default, the stream settings will be on x264 (CPU), which will cause your CPU to overload. But don’t worry, I will be going through every setting and optimize your stream settings.
Step 1: Head over to settings.
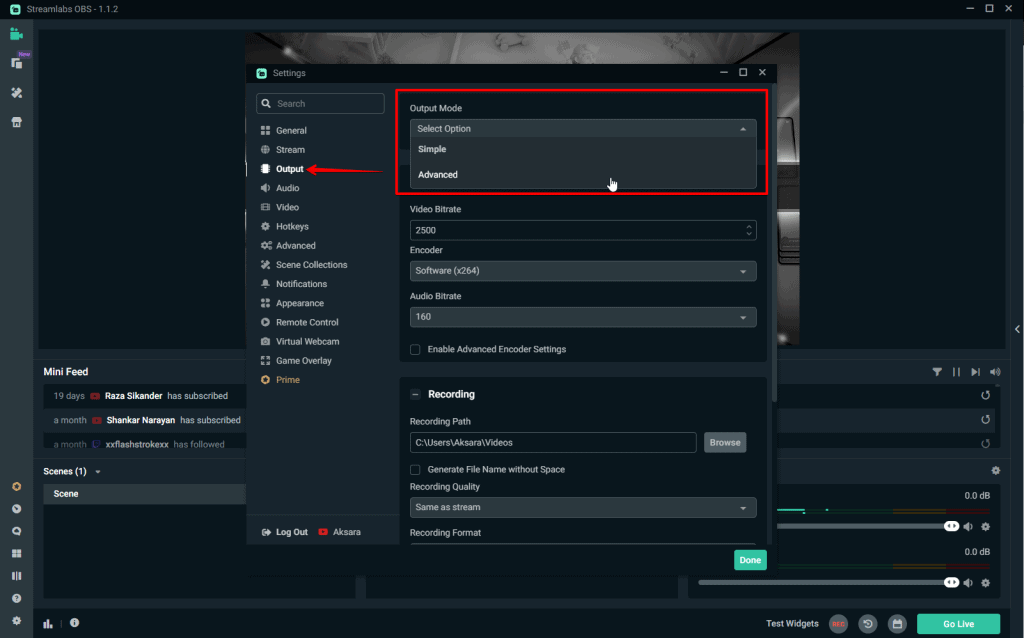
Step 2: Under the settings, head over to output and change the output mode from simple to advance.
Step 3: Once you change the setting to advanced, change the settings to the below-mentioned settings:
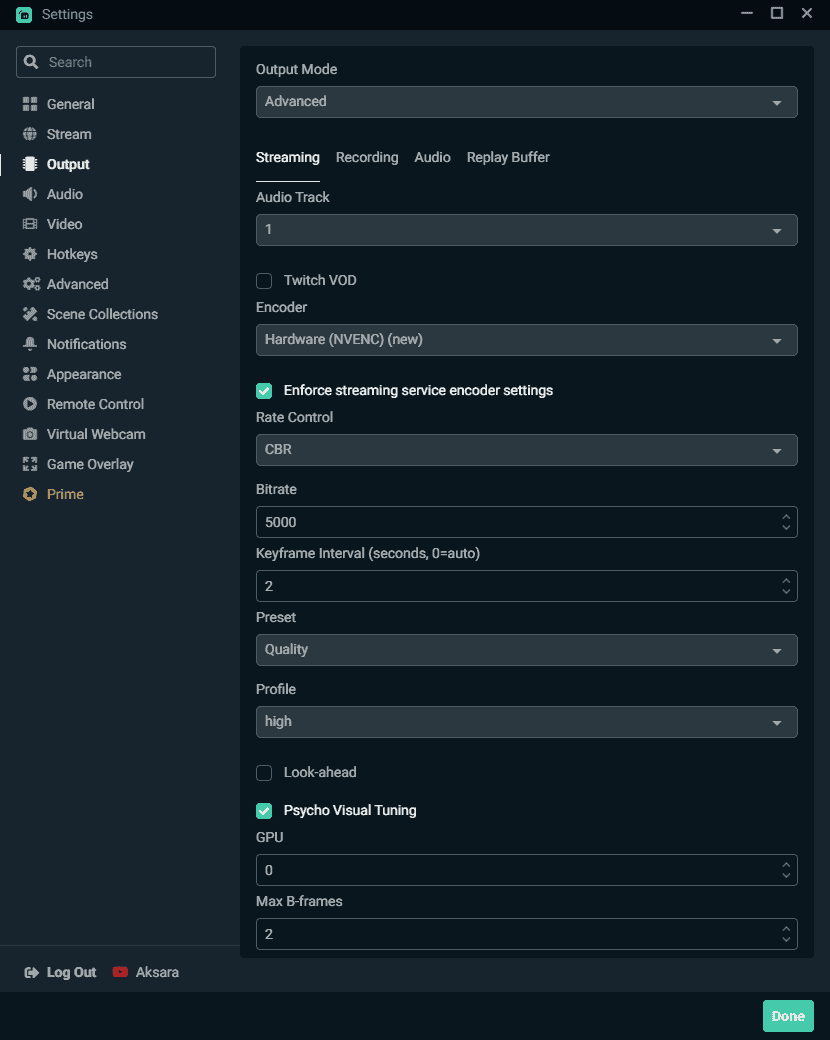
Audio Track – 1
Twitch VOD – Uncheck
Encoder – Hardware (NVENC) (new)
Enforce streaming service encoder settings – Checked
Rate control – CBR
Bitrate – 5000
Keyframe interval (Seconds, 0=auto) – 2
Preset – Quality
Profile – High
Look Ahead – Uncheck
GPU – 0
Max B-Frames – 2
Please note: Only the bitrate is under your control, and it is directly related to your upload speed. For example, depending upon the upload speed of your internet, the bitrate should be changed.
Step 2: The next thing you need to change is under the video settings tab. Here, you can configure the resolution you want depending upon your system configuration and the game you are playing.
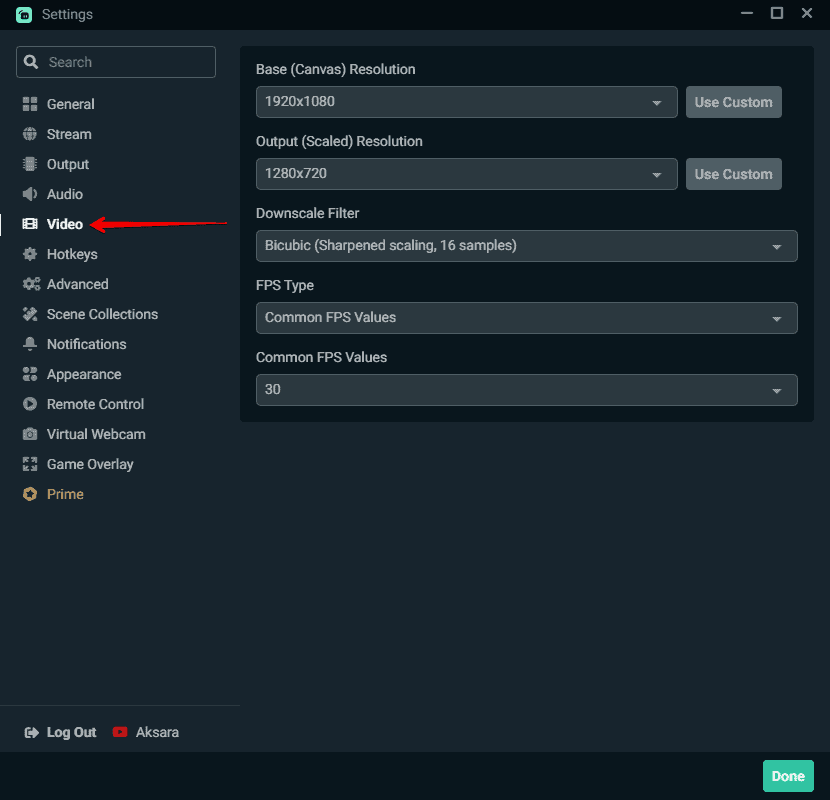
Under the video tab, you can keep both the Base (Canvas) resolution and Output (Scaled) resolution at 1920 x 1080. The downscale filter can be kept as Lanczos (Sharpened scaling, 32 samples), FPS type as common FPS values, Encoder head over, and Common FPS values at 60 to stream at 1080p 60fps.
This concludes the installation of Streamlabs OBS, setting up a basic scene on Steamlabs, and configuring the settings inside the app for streaming. But before we proceed further, here are the best bitrate settings for different platforms:
Bitrate Settings for Facebook
- Recommended max bitrate for Facebook is 4000 Kbps
- Max resolution is 1920 x 1080p at 60fps
- The minimum keyframe interval should be 2 seconds
- Allows only H264 video & AAC encoded audio
Bitrate Settings for YouTube
- Max resolution up to 4K resolution
- Recommended bitrates:
- 1080p – 3000 to 9000 Kbps
- 1440p – 6000 to 18000 Kbps
- 4K – 13000 to 51000 Kbps
- The minimum keyframe interval should be 2 seconds
- Allows only H264 for video and AAC & MP3 encoded audio
- The minimum keyframe interval should be 2 seconds
Bitrate Settings for Twitch
- Maximum resolution up to 1080p
- Recommended bitrate between 3000 to 6000 Kbps
- Keyframe interval 2 seconds
- H264 for video & AAC encoded for audio
That’s all. You’re all set with the stream settings and setup. Now all you have to do is to click on Go Live and start streaming. #HappyStreaming
Founder of MeshPie.com, a technology blog. He loves playing FPS games especially CSGO and Valorant. By day, he works as a product marketer and by night, he is a gamer & a streamer. You can connect with him @aakkssaarraa on Facebook, Instagram, and Steam. Happy Gaming! 🎮
